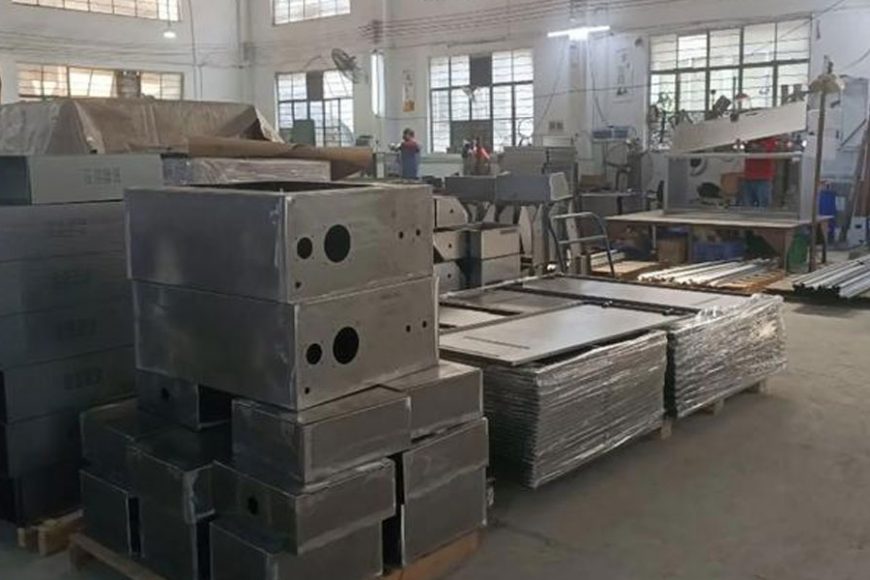
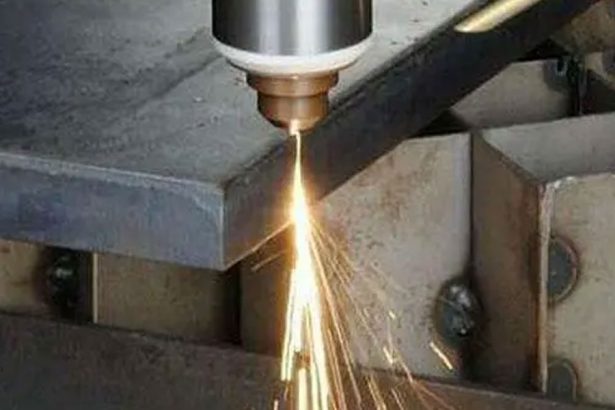
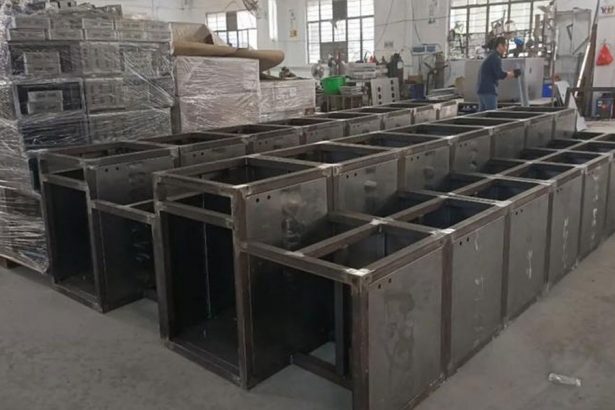
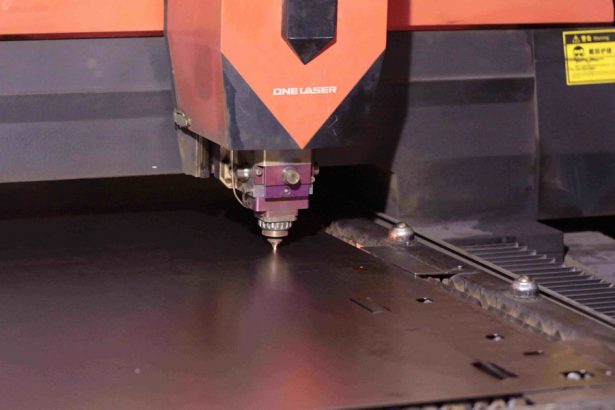
Sheet metal parts are integral to industries such as automotive, aerospace, electronics, and construction, where precision, durability, and compliance with stringent tolerances are paramount. The quality of sheet metal components directly impacts the performance, safety, and reliability of final products, necessitating robust inspection methods to detect defects, verify dimensions, and ensure adherence to design specifications. Historically, manual inspection techniques, such as calipers, gauges, and visual checks, dominated quality control processes. However, these methods are labor-intensive, prone to human error, and inadequate for the high-throughput demands of modern manufacturing. The advent of optical inspection systems has revolutionized quality assurance in sheet metal production, offering non-contact, high-speed, and highly accurate solutions for dimensional and surface analysis.
Optical inspection systems leverage advanced imaging technologies, including cameras, lasers, and structured light, to capture detailed data about a part’s geometry, surface characteristics, and defects. These systems have evolved significantly over the past few decades, driven by advancements in optics, sensor technology, computing power, and machine learning. This article provides a comprehensive exploration of the development of optical inspection systems for sheet metal parts, tracing their historical roots, technological milestones, current state-of-the-art solutions, and future prospects. It examines the principles underlying these systems, their applications across industries, and the challenges faced in their implementation. Detailed comparisons of various optical inspection technologies are presented in tables to facilitate understanding of their capabilities and limitations.
Historical Context of Sheet Metal Inspection
Early Methods of Sheet Metal Inspection
The inspection of sheet metal parts dates back to the Industrial Revolution, when sheet metal became a staple in manufacturing due to its versatility and strength. Early inspection methods relied heavily on manual tools, such as rulers, calipers, and protractors, to measure dimensions and verify tolerances. Visual inspection was used to identify surface defects like scratches, dents, or weld imperfections. These methods, while effective for low-volume production, were time-consuming and inconsistent, particularly for complex geometries or high-precision requirements.
In the early 20th century, the introduction of coordinate measuring machines (CMMs) marked a significant advancement in dimensional inspection. CMMs used mechanical probes to measure the coordinates of points on a part’s surface, enabling precise verification of dimensions against design specifications. However, CMMs were slow, required skilled operators, and were sensitive to environmental factors like temperature and vibration, making them unsuitable for factory floor use. Additionally, CMMs were contact-based, posing a risk of damaging delicate or thin sheet metal parts.
Emergence of Non-Contact Inspection
The limitations of manual and contact-based methods spurred research into non-contact inspection technologies in the mid-20th century. Optical methods, which use light to measure or analyze objects, gained traction due to their speed, accuracy, and ability to inspect without physical contact. Early optical inspection systems relied on simple imaging techniques, such as shadowgraphy, where a part’s silhouette was projected onto a screen for comparison with a template. These systems were limited to 2D measurements and struggled with complex geometries or reflective surfaces.
The development of lasers in the 1960s and charge-coupled device (CCD) cameras in the 1970s laid the foundation for modern optical inspection systems. Lasers provided a coherent light source for precise measurements, while CCD cameras enabled high-resolution imaging and digital processing. By the 1980s, optical inspection systems began to appear in industrial settings, primarily for surface defect detection in steel production and basic dimensional checks in sheet metal manufacturing. These early systems were rudimentary, often requiring controlled lighting conditions and manual calibration, but they demonstrated the potential of optics for automated quality control.
Principles of Optical Inspection Systems
Fundamentals of Optical Measurement
Optical inspection systems operate on the principle of capturing and analyzing light reflected or scattered from a part’s surface. The interaction of light with the part provides information about its geometry, surface texture, and defects. Key optical techniques used in sheet metal inspection include:
- Laser Triangulation: A laser beam is projected onto the part’s surface, and the reflected light is captured by a camera at an angle. The displacement of the reflected beam is used to calculate the distance to the surface, enabling 3D reconstruction of the part’s geometry.
- Structured Light Projection: Patterns of light, such as stripes or grids, are projected onto the part. A camera captures the distorted patterns, which are analyzed to reconstruct the 3D surface.
- Photogrammetry: Multiple images of a part are taken from different angles, and software algorithms triangulate the positions of features to create a 3D model.
- White Light Interferometry: White light is split into two beams, one reflected from the part and the other from a reference surface. The interference patterns are analyzed to measure surface height with nanometer precision.
- Conoscopic Holography: A laser beam is passed through a birefringent crystal, creating interference patterns that encode distance information. This technique is particularly effective for measuring small features.
These techniques are complemented by advanced image processing algorithms, which extract features, detect defects, and compare measurements to CAD models. The choice of technique depends on the part’s material, geometry, and inspection requirements.
Advantages of Optical Inspection
Optical inspection systems offer several advantages over traditional methods:
- Non-Contact Measurement: Eliminates the risk of damaging delicate parts and enables inspection of soft or thin materials.
- High Speed: Capable of capturing millions of data points per second, suitable for high-throughput production lines.
- High Accuracy: Achieves submicron precision for dimensional and surface measurements.
- Versatility: Can inspect 2D and 3D features, including holes, edges, bends, and surface defects.
- Automation: Integrates with robotic systems and CAD software for fully automated inspection processes.
Challenges in Optical Inspection
Despite their advantages, optical inspection systems face challenges:
- Reflective Surfaces: Sheet metal often has shiny or polished surfaces, causing unwanted reflections that can interfere with measurements.
- Complex Geometries: Internal edges, holes, and folds can be difficult to measure due to occlusion or limited light reflection.
- Environmental Sensitivity: Dust, vibration, and ambient light can affect measurement accuracy on the factory floor.
- Data Processing: The large volume of data generated requires significant computational resources and sophisticated algorithms.
Evolution of Optical Inspection Technologies
1980s–1990s: Early Optical Systems
The 1980s marked the commercialization of optical inspection systems for sheet metal parts. Early systems, such as those developed by companies like Keyence and Cognex, focused on 2D vision systems for defect detection and basic dimensional checks. These systems used monochrome CCD cameras and simple image processing algorithms to identify surface imperfections, such as scratches or dents, on flat sheet metal parts. However, their capabilities were limited to 2D measurements, and they struggled with reflective surfaces and complex geometries.
In the 1990s, laser-based systems gained prominence. Laser triangulation systems, which used a single laser point or line to scan a part’s surface, enabled 3D measurements with improved accuracy. These systems were particularly effective for inspecting flat parts but faced challenges with internal edges and holes, where the laser beam could not be positioned perpendicularly, reducing reflected light and measurement accuracy.
2000s: Advancements in 3D Scanning
The 2000s saw significant advancements in 3D optical scanning technologies, driven by improvements in sensor resolution, computing power, and software algorithms. Structured light systems, which project patterns of light onto a part’s surface, emerged as a powerful tool for 3D inspection. These systems could capture entire surfaces in a single scan, making them ideal for complex sheet metal parts with bends, folds, or embossed features.
Companies like GOM (now part of ZEISS) and Creaform introduced portable 3D scanners that combined structured light with photogrammetry for high-accuracy measurements. The GOM ATOS system, for example, used blue light projection and high-resolution cameras to measure entire surfaces and sharp-edged features with subpixel accuracy. These systems were widely adopted in the automotive and aerospace industries, where they reduced inspection times and improved process reliability.
Laser triangulation systems also evolved during this period, with the development of multi-line laser scanners that could capture larger areas in a single pass. However, limitations in measuring internal edges persisted, prompting research into hybrid systems that combined laser scanning with other techniques, such as white light interferometry or conoscopic holography.
2010s: Integration of Automation and AI
The 2010s marked a turning point in optical inspection with the integration of automation and artificial intelligence (AI). Automated optical inspection (AOI) systems, such as the ZEISS ATOS ScanBox, combined 3D scanning with robotic arms and virtual measuring rooms (VMRs) for fully automated inspection workflows. These systems could scan and analyze sheet metal parts without human intervention, providing immediate feedback on quality and enabling real-time process adjustments.
AI and machine learning algorithms enhanced the capabilities of optical inspection systems by improving defect detection and classification. Traditional image processing relied on predefined rules, which struggled with variable defects or complex surfaces. Deep learning models, trained on large datasets of defective and non-defective parts, could identify subtle anomalies, such as micro-cracks or surface roughness variations, with high accuracy. Schuler’s Visual Quality Inspection (VQI) system, introduced in 2022, used AI to detect defects on pressed sheet metal parts by comparing them to a “golden” master part, achieving high reliability with minimal setup time.
The rise of Industry 4.0 further accelerated the adoption of optical inspection systems. These systems were integrated into smart factories, where they communicated with other machines, such as presses and CNC machines, to optimize production processes. Real-time data from optical inspections enabled predictive maintenance, reducing downtime and waste.
2020s: State-of-the-Art Developments
As of 2025, optical inspection systems for sheet metal parts have reached unprecedented levels of sophistication. Key developments include:
- High-Speed Scanning: Systems like the InspecVision Planar 2D can capture up to 80 million measurements in seconds, making them the fastest 2D inspection systems available.
- Hybrid Technologies: Systems combining laser triangulation, structured light, and white light interferometry offer comprehensive inspection of both surfaces and edges. The Creaform Sheet Metal Add-on, for example, provides fast and repeatable 3D scanning for complex parts.
- Portable Solutions: Handheld scanners, such as Scantech’s AXE 3D scanner, enable flexible inspection on the factory floor, overcoming the limitations of fixed systems. These scanners use high-power light sources to enhance contrast and accurately measure holes and edges.
- Deep Learning Integration: Advanced neural networks enable end-to-end inspection, where systems automatically detect, classify, and report defects without predefined rules. This approach is particularly effective for high-variability defects in steel surfaces.
- Robustness to Environmental Factors: Modern systems are designed for factory floor use, with features like vibration-free motion, automated calibration, and compensation for ambient temperature changes.
These advancements have made optical inspection systems indispensable for sheet metal manufacturing, enabling manufacturers to meet the stringent quality requirements of industries like automotive and aerospace while reducing costs and waste.
Key Optical Inspection Technologies
Laser Triangulation Systems
Laser triangulation systems project a laser beam onto a part’s surface and measure the displacement of the reflected beam to calculate distance. These systems are widely used for 3D inspection due to their high accuracy and speed. However, they struggle with reflective surfaces and internal edges, where the laser beam cannot be positioned optimally.
Structured Light Systems
Structured light systems project patterns of light, such as stripes or grids, onto a part’s surface. The distortion of these patterns is captured by a camera and analyzed to reconstruct the 3D geometry. These systems excel at measuring complex surfaces and are less sensitive to reflections than laser systems. They are commonly used in automated inspection setups, such as the ZEISS ATOS ScanBox.
White Light Interferometry
White light interferometry uses interference patterns to measure surface height with nanometer precision. This technique is ideal for inspecting surface roughness and small features but is limited to small areas and requires controlled conditions, making it less suitable for factory floor use.
Conoscopic Holography
Conoscopic holography uses a birefringent crystal to create interference patterns that encode distance information. It is effective for measuring small features and internal edges but is less common due to its complexity and cost.
Photogrammetry
Photogrammetry reconstructs 3D models from multiple 2D images taken from different angles. It is highly flexible and can be used with portable cameras, making it suitable for large parts or on-site inspections. However, it is less accurate than laser or structured light systems for small features.
Comparison of Optical Inspection Technologies
The following table compares the key optical inspection technologies used for sheet metal parts:
| Technology | Measurement Type | Accuracy | Speed | Best Applications | Limitations | Example Systems |
|---|---|---|---|---|---|---|
| Laser Triangulation | 3D | ±10–100 µm | High (10^6 points/s) | Surface scanning, dimensional checks | Struggles with internal edges, reflective surfaces | Keyence WM-3000, Virtek Scanner |
| Structured Light | 3D | ±5–50 µm | High (10^7 points/s) | Complex geometries, full-surface inspection | Requires controlled lighting | ZEISS ATOS, GOM Triple Scan |
| White Light Interferometry | Surface Height | ±1 nm | Low (10^4 points/s) | Surface roughness, small features | Limited to small areas, sensitive to environment | None widely used for sheet metal |
| Conoscopic Holography | 3D | ±10–50 µm | Medium (10^5 points/s) | Small features, internal edges | Complex setup, high cost | None widely used for sheet metal |
| Photogrammetry | 3D | ±50–200 µm | Medium (10^5 points/s) | Large parts, reverse engineering | Lower accuracy for small features | OpenScan.eu, Bambu Lab |
Applications in Sheet Metal Manufacturing
Automotive Industry
The automotive industry is one of the largest users of sheet metal parts, which form critical components like body panels, chassis, and structural supports. Optical inspection systems are used for:
- First Article Inspection: Verifying that initial parts meet design specifications before full production.
- Production Control: Monitoring dimensional accuracy and surface quality during high-volume production.
- Hole and Edge Inspection: Ensuring precise positioning of holes and edges for assembly and performance.
- Weld Inspection: Detecting defects in welds, such as cracks or porosity, using visual and ultrasonic methods.
The Scantech AXE 3D scanner, for example, has been used to inspect stamped sheet metal parts, reducing inspection time and improving accuracy by scanning parts from multiple angles without contact.
Aerospace Industry
Aerospace applications demand the highest precision and reliability due to safety-critical requirements. Optical inspection systems are used to:
- Verify Complex Geometries: Inspecting parts with intricate shapes, such as turbine blades or fuselage panels.
- Reverse Engineering: Creating digital models of legacy parts for reproduction or modification.
- Surface Defect Detection: Identifying micro-cracks or surface roughness that could affect aerodynamic performance.
The InspecVision Planar system is widely used in aerospace for its ability to measure flat parts with high speed and accuracy, supporting both inspection and reverse engineering.
Electronics and Telecommunications
In electronics, sheet metal parts are used for enclosures, heat sinks, and shielding components. Optical inspection ensures:
- Dimensional Accuracy: Verifying tolerances for tight-fitting enclosures.
- Surface Finish: Ensuring smooth surfaces to prevent electrical interference.
- Feature Inspection: Checking the placement of holes, slots, and connectors.
The ZEISS ATOS ScanBox is popular in this sector for its automated inspection capabilities, enabling high-throughput quality control.
Other Industries
Optical inspection systems are also used in industries like renewable energy, medical technology, and construction, where sheet metal parts require precise dimensional and surface quality. For example, the BVS Group, a German sheet metal fabricator, reported a 50% improvement in inspection efficiency after adopting the InspecVision Planar system.
Case Studies
Schuler’s Visual Quality Inspection (VQI) System
Schuler’s VQI system, introduced in 2022, is a camera-based solution for detecting defects on pressed sheet metal parts. The system uses a “golden” part as a template, allowing operators to configure it with minimal training. VQI compares parts on the outfeed conveyor to the template, identifying deviations in seconds. Its integration with Schuler’s Visual Die Protection (VDP) system enhances its versatility, making it suitable for automotive suppliers. The system’s AI-driven approach reduces false alarms and setup time, improving efficiency.
ZEISS ATOS ScanBox in Automotive Manufacturing
The ZEISS ATOS ScanBox is an automated 3D scanning system used by automotive manufacturers for quality assurance. It combines structured light scanning with robotic arms and a virtual measuring room (VMR) to perform measurements without human intervention. The system can inspect reflective surfaces and sharp-edged features, such as laser-trimmed edges and hole patterns, with high precision. Its parametric ZEISS INSPECT software supports multi-part scanning and trend analyses, enabling manufacturers to optimize production processes.
InspecVision Planar in Aerospace
The InspecVision Planar system is the fastest 2D inspection machine for sheet metal parts, capable of capturing 80 million measurements in seconds. In aerospace, it is used for inspecting flat parts, such as panels and brackets, and reverse engineering legacy components. The system’s backlit table and high-resolution camera create a silhouette of the part, which is compared to a CAD file for dimensional verification. Its robustness to factory floor conditions, such as scratches and vibrations, makes it ideal for high-demand environments.
Challenges and Limitations
Reflective Surfaces
Sheet metal’s reflective nature poses a significant challenge for optical inspection systems. Shiny or polished surfaces can cause unwanted reflections, reducing measurement accuracy. Structured light systems mitigate this by using diffuse light patterns, but laser-based systems often require surface preparation, such as applying a matte coating, which adds time and cost.
Complex Geometries
Internal edges, holes, and folds are difficult to measure due to occlusion or limited light reflection. Laser triangulation systems struggle with perpendicular alignment, leading to incomplete data. Hybrid systems that combine multiple techniques, such as structured light and photogrammetry, are being developed to address this issue.
Environmental Factors
Factory floors are harsh environments with dust, vibration, and ambient light that can interfere with optical measurements. Modern systems incorporate vibration-free motion, automated calibration, and adaptive lighting to mitigate these factors, but challenges remain in extreme conditions.
Data Processing and Integration
The large volume of data generated by optical inspection systems requires significant computational resources. Real-time processing is essential for high-throughput production, necessitating powerful hardware and optimized algorithms. Additionally, integrating inspection data with other manufacturing systems, such as ERP or MES, requires standardized interfaces and protocols.
Future Directions
Advancements in Sensor Technology
Future optical inspection systems will benefit from advancements in sensor technology, such as ultra-high-speed silicon image sensors with frame rates approaching theoretical limits. These sensors will enable faster scanning and improved resolution, supporting real-time inspection in high-speed production lines.
Deep Learning and End-to-End Inspection
Deep learning will continue to transform optical inspection by enabling end-to-end workflows, where systems automatically detect, classify, and report defects without human intervention. Neural networks trained on diverse datasets will improve the detection of variable defects, such as surface roughness or micro-cracks, enhancing quality control in steel processing.
Integration with Industry 4.0
The integration of optical inspection systems with Industry 4.0 technologies, such as IoT, cloud computing, and digital twins, will enable smarter manufacturing processes. Real-time data from inspections will feed into digital twins, allowing manufacturers to simulate and optimize production. Predictive maintenance based on inspection data will reduce downtime and waste.
Portable and Flexible Systems
Portable and handheld scanners will become more prevalent, offering flexibility for on-site inspections and small-scale production. Systems like the Scantech AXE 3D scanner demonstrate the potential for compact, high-accuracy solutions that can be used in diverse environments.
Sustainability and Cost Reduction
As manufacturers face pressure to reduce costs and environmental impact, optical inspection systems will play a key role in minimizing waste and improving efficiency. Automated systems that detect defects early in the production process will reduce scrap rates, while energy-efficient sensors and algorithms will lower operational costs.
Conclusion
The development of optical inspection systems for sheet metal parts represents a remarkable convergence of optics, computing, and automation. From the manual methods of the Industrial Revolution to the AI-driven systems of today, these technologies have transformed quality control in sheet metal manufacturing. Optical inspection systems offer unparalleled speed, accuracy, and versatility, enabling manufacturers to meet the stringent demands of industries like automotive, aerospace, and electronics. While challenges like reflective surfaces and complex geometries persist, ongoing advancements in sensor technology, deep learning, and Industry 4.0 integration promise to overcome these limitations.
The future of optical inspection lies in smarter, more flexible, and sustainable solutions that empower manufacturers to achieve zero-defect production. As these systems continue to evolve, they will play a central role in driving innovation and competitiveness in the global manufacturing landscape. The detailed comparisons and case studies presented in this article highlight the diversity and capability of optical inspection technologies, providing a foundation for researchers, engineers, and manufacturers to explore their potential further.


